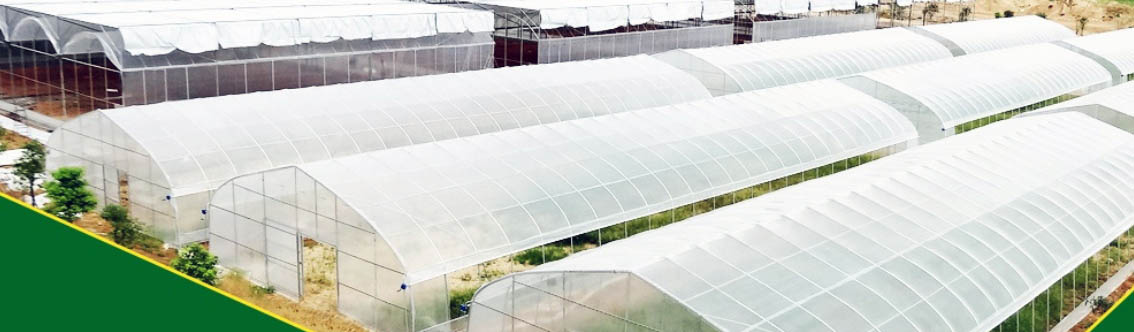

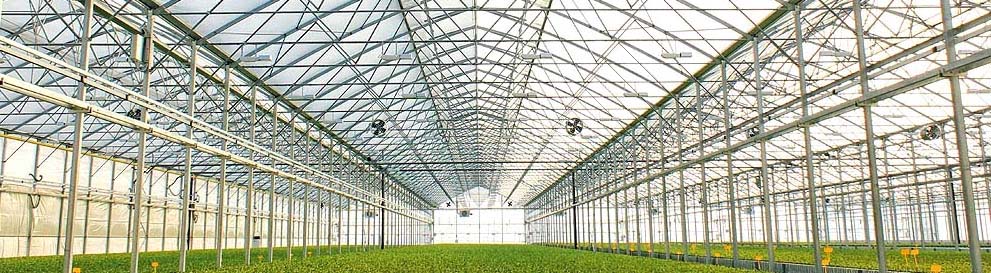
- Commercial Greenhouse
- Film Greenhouse
- PC Greenhouse
- Glass Greenhouse
- Tunnel Greenhouse
- Scientific Research Greenhouse
- Vegetable Greenhouse
- Flower Greenhouse
- Multi-span Greenhouse
- Sawtooth Greenhouse
- Greenhouse Equipments
- Greenhouse Accessories
- Hot Dip Galvanized Pipe
- Irrigation System
- Hydroponics System
- Planting Tools
- Planting technology
Tel: +86 191 5068 3942
Fax:
Mobile: +86 191 5068 3942
Contact: Alina
E-mail: sales@cngreenhouses.com
SKYPE:


Sawtooth Commercial Greenhouse Installation
1,600 m2 sawtooth commercial greenhouse, 80x20 m, hot dip galvanized steel pipe frame, aluminum clips. On-site installation from anchors to film.
.
TEL:+86 191 5068 3942
- Features


This page is about how the house is put up, in the order the work has to be done. The building described on this sheet is a commercial sawtooth film house: 80 m by 20 m, 1,600 square metres under a single layer of film, carried on a hot dip galvanized steel pipe frame with a special grooved channel and aluminum clips holding the covering, and sidewall openings covered by insect nets and roll-up curtains. The sequence below runs from the anchors in the ground to the last fitting on the curtain, and it is written for the site team that receives the packed order and has to turn three groups of parts into a standing house. What the parts are and how a quotation is built from them is the subject of our site and order planning page, and the sizes that have to be settled before the first hole is dug are read off our span, height and load figures page.
What the Basic Sheet Fixes Before Work Starts
| Size | 80 m x 20 m |
| Area | 1,600 square metres |
| Cover material and layer | Film, single layer, 0.15 mm or 0.12 mm |
| Type and scale | Sawtooth greenhouse, middle scale |
| Wind load | 0.35 kN/m2 |
| Snow load | 0.35 kN/m2 |
| Span | 6.4 m, 8 m, 9.6 m or 10 m |
| Total structure height | 4.3 m to 6.5 m |
| Standard | CE |
Every one of those lines turns into a setting-out decision on the ground. The span fixes the position of the columns and how many bays run across the 20 m width. The total height fixes how tall the uprights are cut and how high the eaves sit above the crop. The two load figures fix how the anchors and the bracing are chosen, because the frame that is checked for 0.35 kN/m2 of wind and 0.35 kN/m2 of snow has to be tied to the ground hard enough to hand that load on. None of these numbers may be re-guessed on site; if the ground cannot take the layout, the layout is revised in the drawing and the anchors are re-detailed, not quietly spaced further apart.
Step One: Foundation and Ground Anchors
The first work on site is setting out, not lifting. The 80 m by 20 m rectangle is marked on the levelled ground, the column lines are struck across it at the ordered span, and the anchor positions are marked where those lines cross the house lines. Each position is then opened to the depth the drawing calls for, and the anchor, post or concrete base is set so that its top is at the level the frame expects. On a sloping or stepped plot the whole house does not have to sit on one platform: the sheet offers the sawtooth form as a simple and effective solution for varied and complex topographic conditions, and a repeated roof module can be stepped to follow ground that already exists. What may not be stepped is the line of a single bay, because a bay out of level loads its frame unevenly.
Two checks belong to this step and are easy to lose later. The first is that the anchor top levels across one bay agree before the columns arrive, since correcting them under a standing frame is far more work than correcting them in an open hole. The second is that the anchor is tied into ground that can actually resist uplift, because the same 0.35 kN/m2 wind figure that the frame is checked for is the force that tries to pull the frame out of the soil. General guidance on agricultural buildings and their siting against wind and snow, written for the grower rather than the supplier, is published by the USDA, and it is useful reading before the anchor detail is agreed.
Step Two: Standing the Frame
The frame goes up in modules rather than as one structure. Columns are raised on their anchors and held upright with temporary bracing, then the roof members and the purlins are fixed to them, bay by bay along the 80 m length. The roof line of a sawtooth house is not a single surface: it repeats one tooth after another, each tooth made of a short upright face that carries the roof windows and a longer sloping face that carries the film. Because that module repeats, the reliable way to build it is to complete one bay correctly, use it as the pattern for the next, and keep the house line straight as the bays are added. Temporary bracing stays in place until enough bays are joined for the structure to be self-supporting.
The frame itself is hot dip galvanized steel pipe, chosen so that the structure does not rust; the aluminum parts belong to the grooved channel and the clips that carry the film, not to the load-bearing frame. Two habits during this step protect the finish that the galvanizing was bought for. Pipe is cut and drilled with the swarf cleared away, and cut ends are treated rather than left bright and bare. Members are carried and lifted rather than dragged along the ground, because a scratched coating is where rust begins long before the coating itself wears out.
Step Three: Aligning the Roof and the Sawtooth Ridge
Once the bays are joined, the structure is corrected before anything is covered. The work here is to bring the frame into line in three directions at once: the columns plumb, the house lines straight along the 80 m, and the sawtooth ridge level and even in tooth spacing from one end to the other. A sawtooth ridge is less forgiving of misalignment than a plain arch, because the upright window face and the sloping film face of each tooth have to meet cleanly; if the ridge wanders, the windows bind and the film cannot be pulled down evenly. Cross-bracing and the ridge members are tightened only after the whole line reads true, and the temporary braces come out afterwards, in the reverse order to the one they went in.
The height band matters again at this stage. With the total structure height offered anywhere from 4.3 m to 6.5 m, a taller house carries a longer column and a larger wind area, so the verticality and the bracing of the columns are checked, not assumed, before the covering step begins. Getting the roof line true while the frame is still bare is what makes the next step a straightforward job instead of a running argument with a distorted surface.
Step Four: Covering the House with Film
The covering is polyethylene film in a single layer at 0.15 mm or 0.12 mm, run into the special grooved channel and held with aluminum clips. The order that works on a sawtooth roof is roof first, walls second. The roof film is taken over the sawtooth line, pulled so that it lies flat on both faces of each tooth, and tucked into the channel; only when the roof is fixed and evenly tensioned is the side wall film run. Pulling the film tight is not a matter of pulling hard in one place: the film is worked along the channel so that the tension is shared, because a single over-tightened point tears and a slack panel lifts and slaps in wind.
The grooved channel is part of the covering step, not an accessory added later, and it has a job beyond holding the edge: it reinforces the panels against wind and weather. The film is laid so that the channel runs with it and the clips are seated in sequence along the channel rather than forced in at the corners. On a house this size the covering is the largest single surface the wind acts on, so the fixing at the perimeter and along every ridge and eave line is checked clip by clip before the film is called finished. Reporting on how covered structures behave once they are in use, rather than only when they are sold, is gathered by Hortidaily, and it is a fair check on what a covering system has to survive in service. The choice between covering options and the way the film is hung are set out in full on our film choice and fixing page, and are not repeated here.
Step Five: Fittings, Curtains and Insect Nets
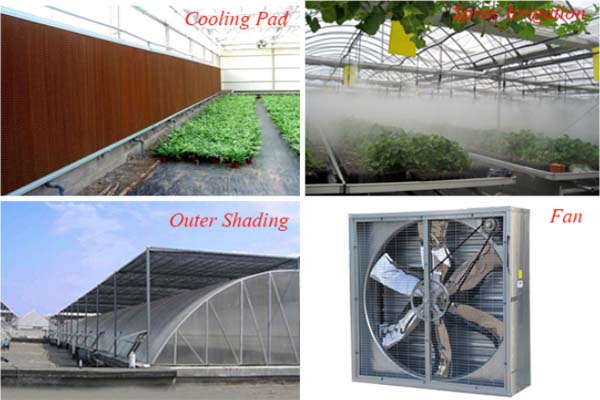
The last step turns a covered frame into a working house. It covers the sidewall openings with their insect nets and roll-up curtains, and it brings in the gear that operates them, either manually or electrically. This is the step where the ordered systems arrive if they were included: cooling and heating, irrigation, ventilation, fertilization, shading, and benches. They are quoted on request together with the house, and the reason to fix them at this stage of the build is practical rather than commercial. A shading system adds a load above the roof and a fixing run along it, irrigation and fertilization bring pipe runs in under the frame, and a ventilation system can extend or replace the side curtains. Hanging them off a finished house afterwards means working around a surface that is already tight and a frame that is already loaded.
The fittings go on in a fixed order as well. The grooved channel and its clips are already in place from the covering step, so the curtain gear, the netting and the opening hardware are set out along each sidewall opening, and the door and the access openings are framed last so that the walkway through the house is clear while the work is done. After that the house is swept, checked and handed over as a complete unit rather than as a set of parts that still need a second visit.
The Galvanized Frame and What the Coating Buys
Because this house is built on hot dip galvanized steel pipe, the coating is the part of the structure that decides how long the frame can be left before maintenance. The corrosion rate of a galvanized coating follows the corrosivity of the air it stands in, and the four bands below are the standard reading of that relationship for a coating of this kind, with the service life shown as the time to first maintenance.
| Heavy industrial air - class C4 | About 13 years to first maintenance |
| Urban conditions - class C3 | About 30 years to first maintenance |
| Coastal conditions - class C5 | About 50 years to first maintenance |
| Clean suburban conditions - class C2 | 50 years or more, without repair |
A class on its own is not an order line, and neither is a service life on its own. The figure that settles both is the coating thickness, because the class and the thickness are what produce the years above. On this house the frame tube carries a specified average coating of 70 to 85 micrometres of zinc, read under BS EN ISO 1461 and selected against BS EN ISO 14713-1, and it is that thickness, named next to the corrosivity class of your site under ISO 9223, that puts a project on one of the four lines. Which is why a coastal plot and a clean inland plot can be built from the same pipe on the same drawing and still deserve different answers. What the four lines are worth during the build itself is narrow and simple: treat every cut, drilled hole and scrape before the covering goes on, because a bare steel face is where the coating starts to be consumed first.
What the House Is Used For and How It Travels
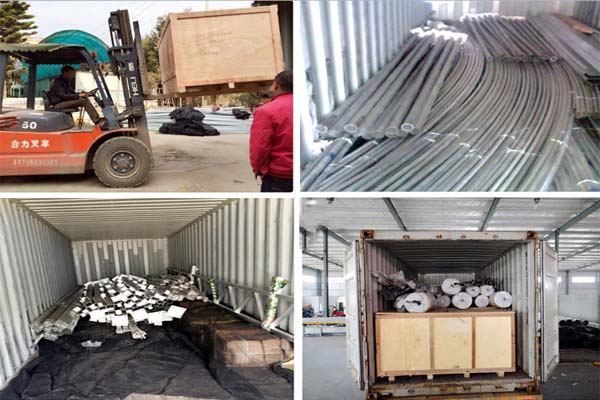
The application line on this sheet reads vegetable, fruit, seed nursery and flower, and the ventilation built into the house is what lets it serve all of them: the sawtooth ridge takes hot air out through the upright roof windows, while the sidewall openings covered by insect nets and roll-up curtains bring air in or out along the sides, manually or electrically operated. The covering is good at keeping warm, so the same house runs through a cold start in spring and a vented summer. The order is packed for export in three groups that match the build sequence: metal structures, covering system, and install accessories. Because the frame members, the film with its channel and clips, and the opening gear all travel together, the site team is not left with a standing frame waiting for a second shipment before it can be covered. Every year customers from many countries visit the factory for business cooperation, and where it is wanted our engineers travel to guide the installation on site.
Frequently Asked Questions
Q: What is the installation sequence for this sawtooth greenhouse?
A: Five steps, in this order. Set out the 80 m by 20 m rectangle and fix the ground anchors. Raise the columns and roof members bay by bay, using one completed bay as the pattern. Align the columns, the house lines and the sawtooth ridge before covering anything. Run the roof film first and the side wall film second, into the grooved channel with the aluminum clips. Then fit the curtains, the insect nets, the doors and any ordered systems. The same order is followed whether the work is guided by our engineers or by your own team.
A: Five steps, in this order. Set out the 80 m by 20 m rectangle and fix the ground anchors. Raise the columns and roof members bay by bay, using one completed bay as the pattern. Align the columns, the house lines and the sawtooth ridge before covering anything. Run the roof film first and the side wall film second, into the grooved channel with the aluminum clips. Then fit the curtains, the insect nets, the doors and any ordered systems. The same order is followed whether the work is guided by our engineers or by your own team.
Q: How are the foundation anchors and the frame set out?
A: The rectangle is marked on levelled ground and the column lines are struck across it at the ordered span, which is 6.4 m, 8 m, 9.6 m or 10 m. Anchor positions are marked where those lines cross the house lines, opened to the depth on the drawing, and set so their tops sit at the level the frame expects. Two checks decide whether the step is safe: anchor top levels agree across a bay before the columns arrive, and the anchor is tied into ground that can resist uplift. On sloping or stepped ground the repeated roof module can follow the ground, but a single bay is never built out of level.
A: The rectangle is marked on levelled ground and the column lines are struck across it at the ordered span, which is 6.4 m, 8 m, 9.6 m or 10 m. Anchor positions are marked where those lines cross the house lines, opened to the depth on the drawing, and set so their tops sit at the level the frame expects. Two checks decide whether the step is safe: anchor top levels agree across a bay before the columns arrive, and the anchor is tied into ground that can resist uplift. On sloping or stepped ground the repeated roof module can follow the ground, but a single bay is never built out of level.
Q: Which film thickness is used when covering the house?
A: Polyethylene film in a single layer at 0.15 mm or 0.12 mm. The roof film is run first and the side wall film second, so that the largest surface is settled and evenly tensioned before the walls are closed in. The tension is worked along the channel rather than pulled hard at one point, because a local over-tightening tears the film and a slack panel lifts and slaps in wind.
A: Polyethylene film in a single layer at 0.15 mm or 0.12 mm. The roof film is run first and the side wall film second, so that the largest surface is settled and evenly tensioned before the walls are closed in. The tension is worked along the channel rather than pulled hard at one point, because a local over-tightening tears the film and a slack panel lifts and slaps in wind.
Q: How is the film held down against wind?
A: The film runs into a special grooved channel frame and is held with aluminum clips, and the channel is not just an edge grip: it reinforces the panels against wind and weather. The clips are seated in sequence along the channel rather than forced in at the corners. On a house this size the covering is the largest surface the wind acts on, so the fixing along every ridge, eave and perimeter line is checked clip by clip before the covering is called finished.
A: The film runs into a special grooved channel frame and is held with aluminum clips, and the channel is not just an edge grip: it reinforces the panels against wind and weather. The clips are seated in sequence along the channel rather than forced in at the corners. On a house this size the covering is the largest surface the wind acts on, so the fixing along every ridge, eave and perimeter line is checked clip by clip before the covering is called finished.
Q: How long does the galvanized frame last before maintenance?
A: It depends on the corrosivity of the air around the site. Under ISO 9223 a standard galvanized coating gives about 13 years to first maintenance in heavy industrial air (class C4), about 30 years in urban conditions (class C3), about 50 years in coastal conditions (class C5), and 50 years or more without repair in clean suburban conditions (class C2). The frame tube on this house carries a specified average coating of 70 to 85 micrometres of zinc under BS EN ISO 1461, so name your site class and that thickness and the line follows. Every cut and drilled hole made during the build is treated afterwards.
A: It depends on the corrosivity of the air around the site. Under ISO 9223 a standard galvanized coating gives about 13 years to first maintenance in heavy industrial air (class C4), about 30 years in urban conditions (class C3), about 50 years in coastal conditions (class C5), and 50 years or more without repair in clean suburban conditions (class C2). The frame tube on this house carries a specified average coating of 70 to 85 micrometres of zinc under BS EN ISO 1461, so name your site class and that thickness and the line follows. Every cut and drilled hole made during the build is treated afterwards.
Q: Can your engineers guide the installation on site?
A: Yes. Where it is wanted we send engineers to foreign countries to guide the installation, working alongside the site team rather than in place of it, and many customers also visit the factory before or after the order. The house is packed so that the frame, the covering system and the install accessories all travel together, which is what allows the sequence above to be completed in one campaign on site instead of being interrupted for parts. The full range can be seen on our sawtooth greenhouse range page.
A: Yes. Where it is wanted we send engineers to foreign countries to guide the installation, working alongside the site team rather than in place of it, and many customers also visit the factory before or after the order. The house is packed so that the frame, the covering system and the install accessories all travel together, which is what allows the sequence above to be completed in one campaign on site instead of being interrupted for parts. The full range can be seen on our sawtooth greenhouse range page.
Contact
To talk through the build sequence, the anchor detail or the systems you want ordered with the house, call us on +86 191 5068 3942 or write to sales@cngreenhouses.com.
Note: If you're interested in the product, please submit your requirements and contacts and then we will contact you in two days. We promise that all your informations won't be leaked to anyone.
 Deutsch
 Español
 Français
 Italiano
 Português
 日本の
 한국어
 العربية
 български
 hrvatski
 česky
 Dansk
 Nederlands
 suomi
 Ελληνικά
 हिन्दी
 norsk
 Polski
 Română
 русский
 Svenska